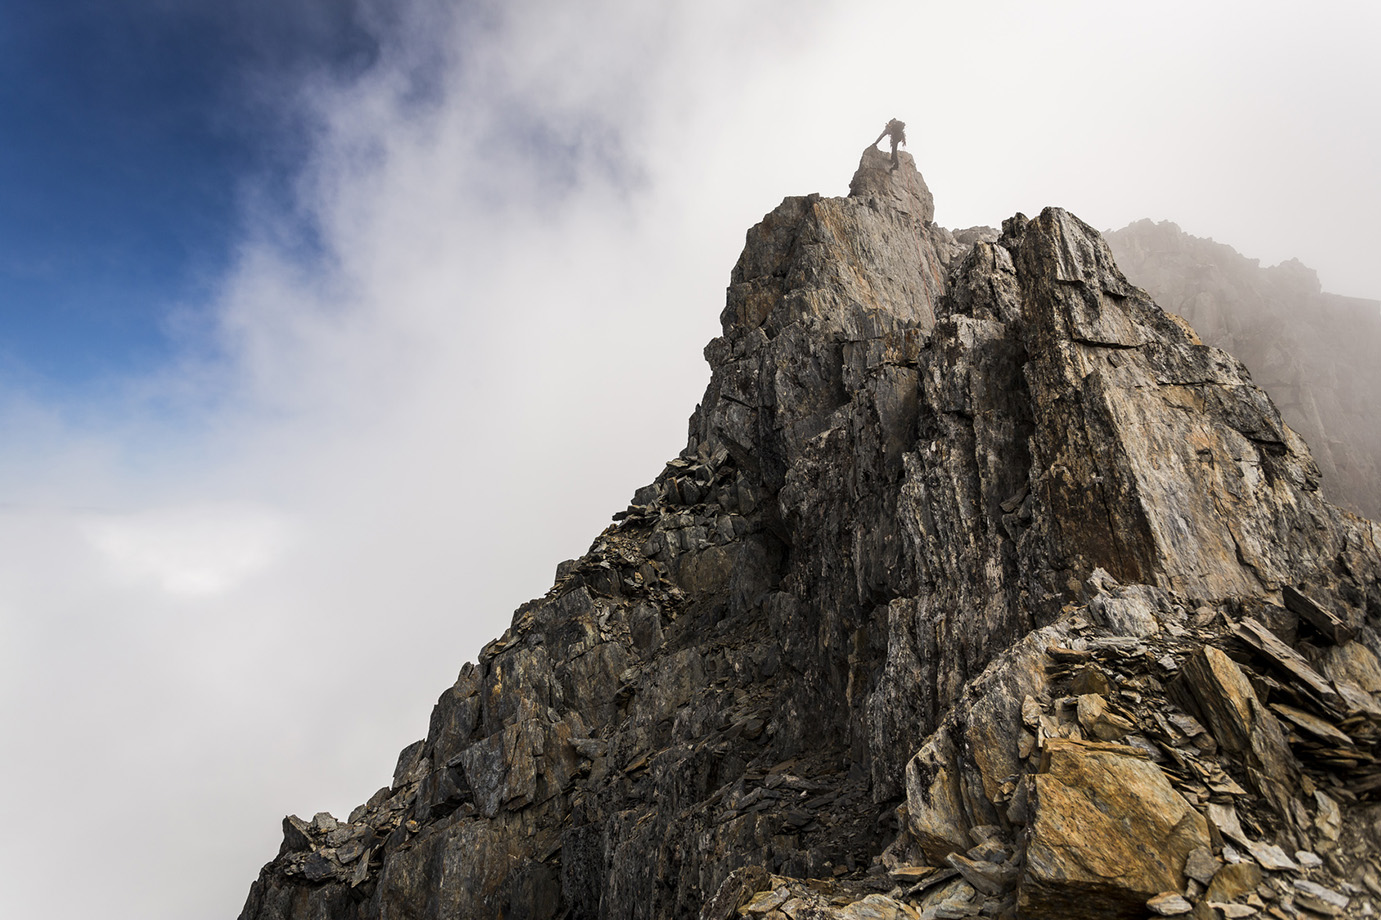
The first time I drove into Yosemite Valley I pulled over at the Tunnel View and stood there for a long time doing nothing. El Capitan to the left. Half Dome straight ahead. Bridalveil Fall catching the morning light on the right. Every photograph you've ever seen of this place fails it in some fundamental way. The scale is something your brain has to recalibrate to experience.
I'd been climbing at indoor gyms for eight months before that trip. I thought I was ready. I was not ready — at least not in the way I imagined. What I was ready for, it turned out, was exactly the right amount of humility to start learning something real.
The Valley and Its Routes
Yosemite's climbing history is inseparable from American climbing's history. The big walls — El Cap, Half Dome, the Cathedral Spires — are where aid climbing and later free climbing were invented, refined, and pushed to their current extremes. That legacy hangs in the air. But the Valley has more than 3,000 documented routes, and a significant portion of them are accessible to people who are still figuring out how to clip a quickdraw without looking like they're fighting it.
The granite here is unlike anything you'll find indoors. It's coarse and unforgiving of sloppy footwork, but rewarding when you commit. Friction smears that look impossible hold body weight. Finger cracks that look like they should be simple will humble you within two moves. The stone has texture, character, and an opinion about whether you deserve to climb on it.
Beginner Crags: Where to Start
Swan Slab
Swan Slab sits near Camp 4 and is where most beginners find their footing. Routes like Guide Crack (5.6) and Grant's Crack (5.7) offer clean lines on solid granite. The grades feel sandbagged — "5.7" at Yosemite is not the same psychological experience as 5.7 at your gym. Don't let that discourage you. Let it recalibrate your scale. The rewards of moving cleanly on real rock, placing real gear, and building a real anchor are worth every moment of feeling slow and uncertain.
Manure Pile Buttress
The name does not inspire confidence. The climbing does. Manure Pile sits across the road from El Cap Meadow and hosts some of the most popular moderate multi-pitch routes in the Valley, including After Six (5.7) — a three-pitch route with a memorable hand crack that will teach you more about crack climbing in a single pitch than a month of gym sessions. Most routes here are well-bolted and well-traveled, which means you'll have company and beta if you get stuck.
"Yosemite teaches you that rock doesn't care how confident you feel at the trailhead."
What to Bring
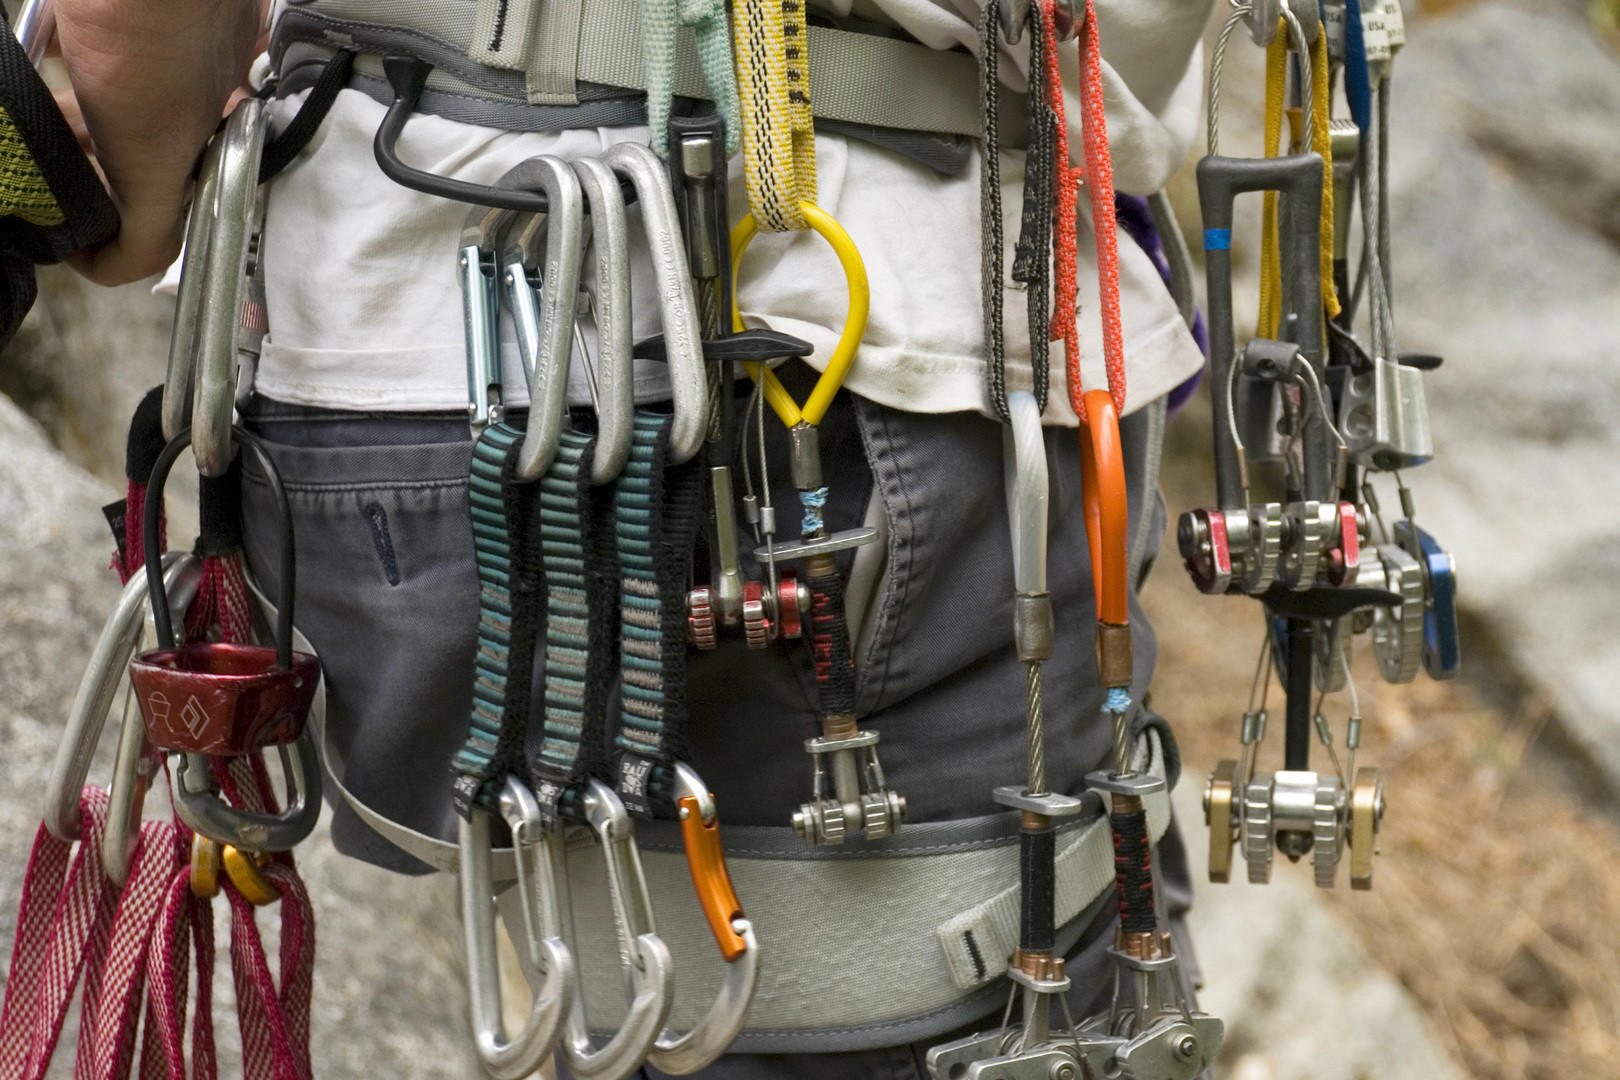
The gear list for Yosemite climbing can spiral quickly if you let it. For single-pitch sport and trad climbing at the beginner level, keep it focused:
- A 60m dry-treated rope — shorter won't get you down on many routes
- Harness fitted properly, belay device, and locking carabiner
- 12 quickdraws for sport routes; a rack of cams for trad (borrow or rent before you buy)
- Climbing shoes sized half a size down from your street shoes for moderate routes
- Chalk bag — the granite will dry your skin fast, especially in low-humidity months
- Helmet — always, no exceptions, no debate
- High-SPF sun protection — the Valley reflects a lot of light off light-colored granite
Logistics: Permits, Camping, Best Season
Yosemite requires reservation-based entry for day visitors during peak season (roughly May through September). You'll book a timed-entry permit through recreation.gov weeks in advance. For overnight stays, Camp 4 is the legendary climbers' campground — walk-in, first-come, shared sites. It fills early. Arrive before 7 a.m. if you want a spot in summer.
The best seasons for rock climbing are late spring (May–June) and fall (September–October). Temperatures are moderate, afternoon thunderstorms are less frequent than in July and August, and the light is extraordinary. July and August are hot and crowded, but the climbing is still excellent if you start early and are off exposed routes by early afternoon.
Safety and Ethics
Yosemite's climbing community has its own ethics, and they are observed seriously. Stay on established routes, don't spray beta at other climbers unless asked, and leave the stone as you found it. Chalk marks should be brushed. Gear placements should not scar the rock. There are people who have climbed these routes hundreds of times, who love these walls the way others love their neighborhoods. Treat their place accordingly.
On safety: take a course before you go. The Yosemite Mountaineering School runs beginner programs out of Curry Village. An outdoor leader belay certification from your local gym gets you started, but it doesn't prepare you for placing gear, building natural anchors, or evaluating rockfall hazard. Invest in instruction early. It pays for itself in confidence and in knowing what you don't know.
The Valley rewards patience. The walls will not be rushed, the rock will not be fooled, and the light — that famous Yosemite light — will come whether you've earned it or not. Show up, be honest about your level, and start small. Everything else follows.
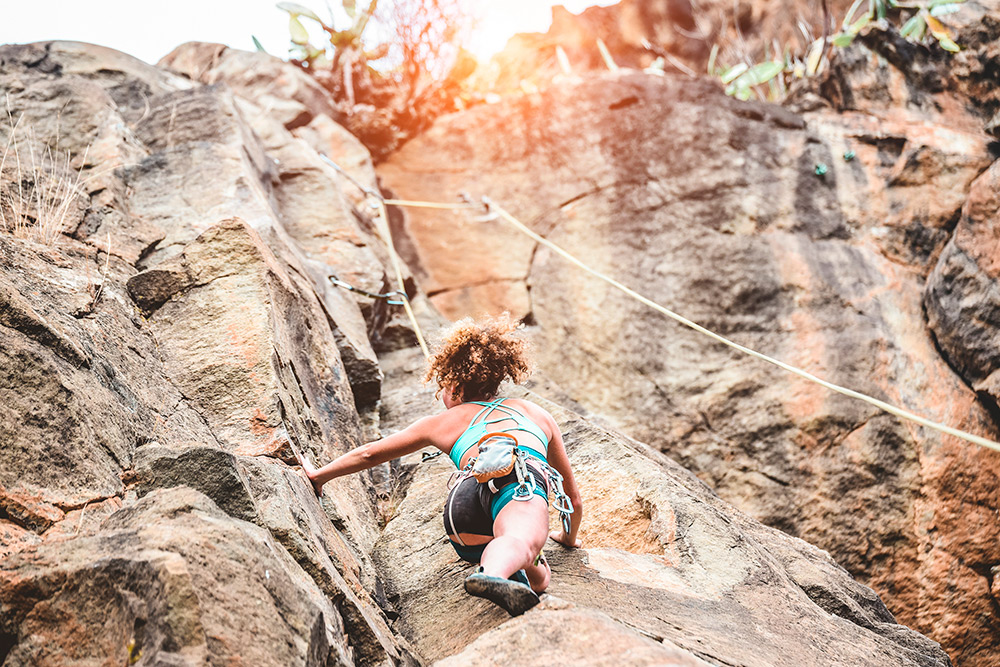
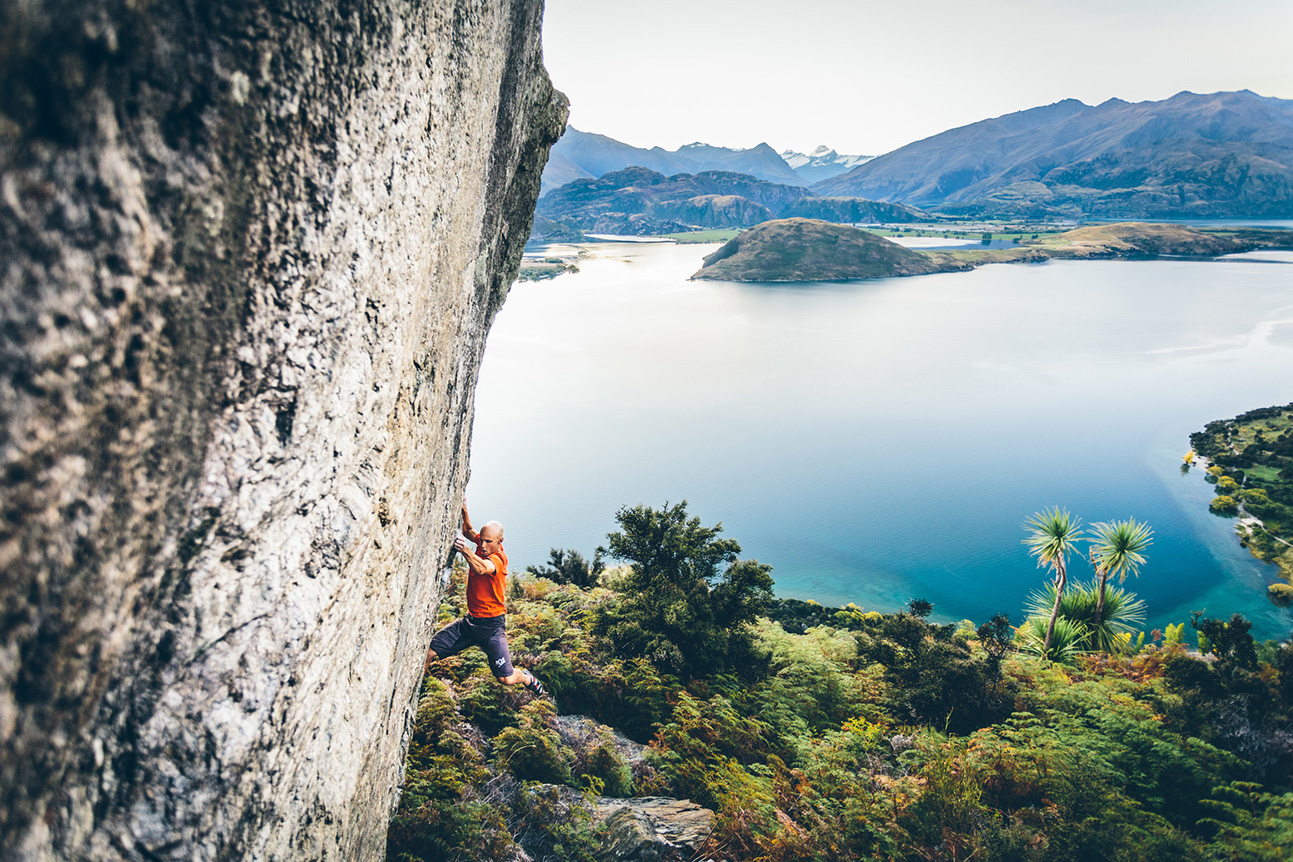
My First Crack: What the Granite Actually Feels Like
I had been to Yosemite twice before I attempted my first trad pitch. Both previous trips were sport climbing at lower-angle crags — routes with fixed protection where the only skill required was clipping and moving. Stepping onto Guide Crack at Swan Slab with a rack of cams for the first time was a categorically different experience, and I want to describe it accurately rather than making it sound either more heroic or more accessible than it was.
The rock at Swan Slab is coarse Yosemite granite — the texture they call "chicken heads," small knobby crystals that catch rubber aggressively. My first few moves on Guide Crack were fine, following the crack up a low-angle section where the feet were abundant and the jams were straightforward finger-to-hand width. Then the angle increased slightly and the crack narrowed, and I realized I had no idea where to put my feet. The gear placements I'd practiced indoors — cam-in-hand, thumb on the trigger, estimate the placement zone — felt entirely different when I was actually on the rock, arms getting tired, the next placement three feet above my last.
I downclimbed four feet to a stance, placed a cam, and thought about it. That four feet of downclimbing — controlled, deliberate, not a fall — was the most important thing I did on that pitch. It was the first time I understood that climbing is not a one-way process. You can go back. You can think. The rock is not trying to prevent you from thinking.
Understanding Yosemite Grades: Why 5.7 Isn't 5.7
The Yosemite Decimal System was developed in the Valley, and the grades established in the 1950s and 1960s have not been revised upward to match modern standards. This means a 5.7 route at Yosemite, established by Royal Robbins in 1958, is technically harder than a 5.7 at a modern climbing gym where the grades are set to encourage progression and retention. This is not a trick. It is historical context. The grades were set by experts climbing in mountain boots on routes that had never been climbed before. They are not going to feel like gym grades.
The useful reframe: when you're looking at a route guide for the Valley, subtract one letter grade from your gym comfort level and use that as your starting point. If you're solid at 5.10b at the gym, start with Yosemite 5.9s and 5.10a's. You will find them at or slightly below your expected difficulty once you've calibrated to the rock. The first day is always the recalibration day. Don't waste it by starting too hard.
Crack climbing specifically requires technique that gym climbing does not teach because gym walls have very few crack features. Hand jams, fist jams, and foot jams are the fundamental vocabulary of Yosemite climbing, and they require practice that is best done at low stakes before you're on a multipitch route above the Valley floor. There are crack climbing clinics offered by the Yosemite Mountaineering School that specifically address this gap. A two-hour clinic will make you twice as effective on crack routes as two days of self-directed learning.
What We Carried
- 60m dry-treated rope (10.1mm diameter for beginners — more durable and easier to handle than skinny ropes)
- Harness with gear loops — at least four; you'll be racking cams and you need the space
- Belay device (tube-style, compatible with your rope diameter) plus one locking carabiner
- Cam rack for trad climbing — standard Valley rack is two sets of cams from 0.5 inch to 3 inch, plus a set of stoppers
- 12 quickdraws for sport routes and intermediate placements on mixed terrain
- Climbing shoes (stiff-soled, half to one full size down from street) — softer shoes for gym; stiffer for Yosemite smearing
- Chalk bag plus loose chalk — refillable, the dry Valley air dries your skin faster than you expect
- Helmet (UIAA certified) — rockfall at Yosemite is not a theoretical risk; it is a documented regular occurrence
- Approach shoes for the walk-in — many Yosemite crags have rocky approaches where climbing shoes are too painful to wear
- Small pack (20–25L) for the crag — water, snacks, rain layer, first aid, guidebook or downloaded topo